


But why ?
Cause everything looks better in Watercolor :)
If you had been following my blog, you would be aware of my dabbles with creating art out of my photographs. This article is about my journey around the same. For a while, had been wondering what to call it. Few things that came to my mind were – Painting with Pixels, Pixel Painting, From Click to Canvas, Painting with a Click, Digital Painting, Artography, Paintograhy etc.
Digital Painting (using Digital tools like stylus, touch screen, tablet etc. and relevant software to create paintings) has a rounded definition and it would not fit for this kind of work. Artography was defined as – An artwork so realistic you thought it was taken by a camera. It did not sound right, but apart from this so-called urban site, I did not see it being used elsewhere. Paintography also seems to be used in a few places and defined as a combination of Digital Photography and Digital Painting. This term seems to have been registered by http://paintography.org, but that site is no longer online.
Am inclined towards using Artography or Painotgraphy – as it goes more closely with ‘Creating Art inspired by Photographs’ :) Anyways, what is there in the name. Let us get started.

Search for the Artist within
A photographer is an artist who paints with light.
As a kid, I had been fascinated with painting. I am grateful to have had my chances to play with watercolor and acrylic during my childhood. Growing up, I lost touch with most of these, dabbling only occasionally.
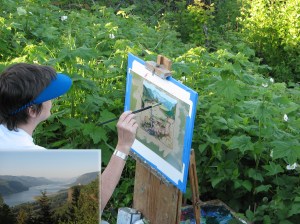
A couple of years back, during one of my Oregon road trips, came across this lady at The Crown Point Overlook (Portland Women’s Forum State Scenic Viewpoint / Chanticleer Point). She was lost in her world, painting the lovely Columbia Gorge view along with the Vista House. It was soothing to watch someone, lost completely in one’s art and nature. Though I envied her, I felt I neither had the skill, nor the tools or the time (damn so many excuses…) to be doing that. My thoughts keep going back to this scene and be able to do it someday. It was probably a decade back, but it kind of stuck a cord and still stays with me.
As a hobby, I do feel more connected with Photography, but my heart keeps coming back to Painting. For some reason, it seems to have an intimate & personal touch. Thus when I came across Digital Painting, I was intrigued. Initially started with it, (mostly) due to laziness (and the familiarity of the software and the digital environment). Not being able to carry the tools of the trade (for painting) everywhere also played into it. The more I play around it, I realize – the flexibility, joy & fulfillment of the creative process and the final output is winning me over.
Eventually, it is all about creating a compelling canvas reminiscent of a painting – evocative with rich color, contrast, texture and convey the mood it was intended for. The medium or the means did not matter as much – at least for me personally. I believe at the peak of creativity, one is completely in ‘the present’ and everything else dissolves – it is kind of a personal journey!
Added advantage – no one questions if this was edited. It is a given that the painting – native or digital – is purely the creation of the painter. There is no question on if it is real. The camera just disappears from the equation :)
Know the difference between Science and science fiction? Science needs to sound and feel real to be accepted. In the same lines: Photos need to feel and look real to a great extent. But Painting is not restricted by these views.
Tweet
The Creative Process
The purpose of art is to get lost …
To get lost in yourself & your own world.
Working on the digital watercolor over the past few years, helped me try out different techniques to get the right feel. It is different, personal and all the more fun. There is no right or wrong. The process is continually getting refined. Below are a few significant things that work for me …
Scouting: Looking for the scene
Every painter, unlike a photographer, begins with a blank canvas.
Tweet
When creating art or for that matter anything you do – it helps to start with the end in mind. As a photographer, this starts way way before the shutter is clicked.
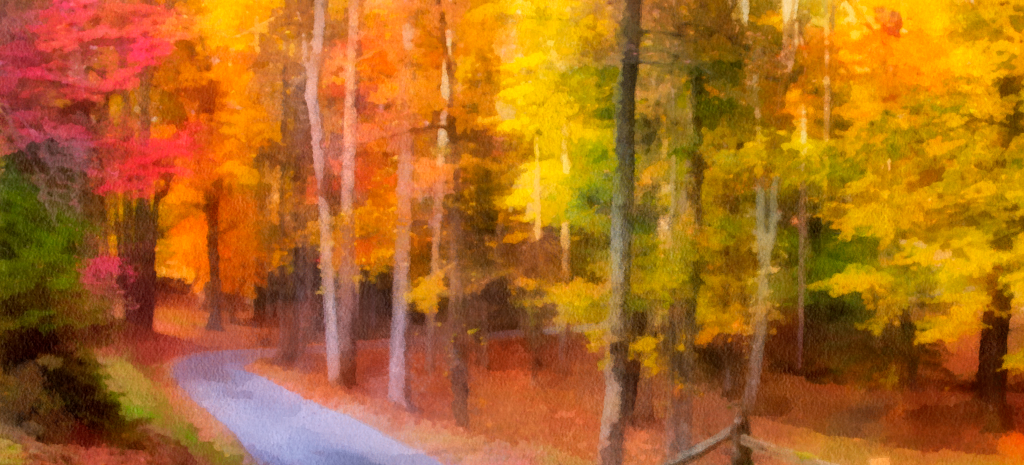
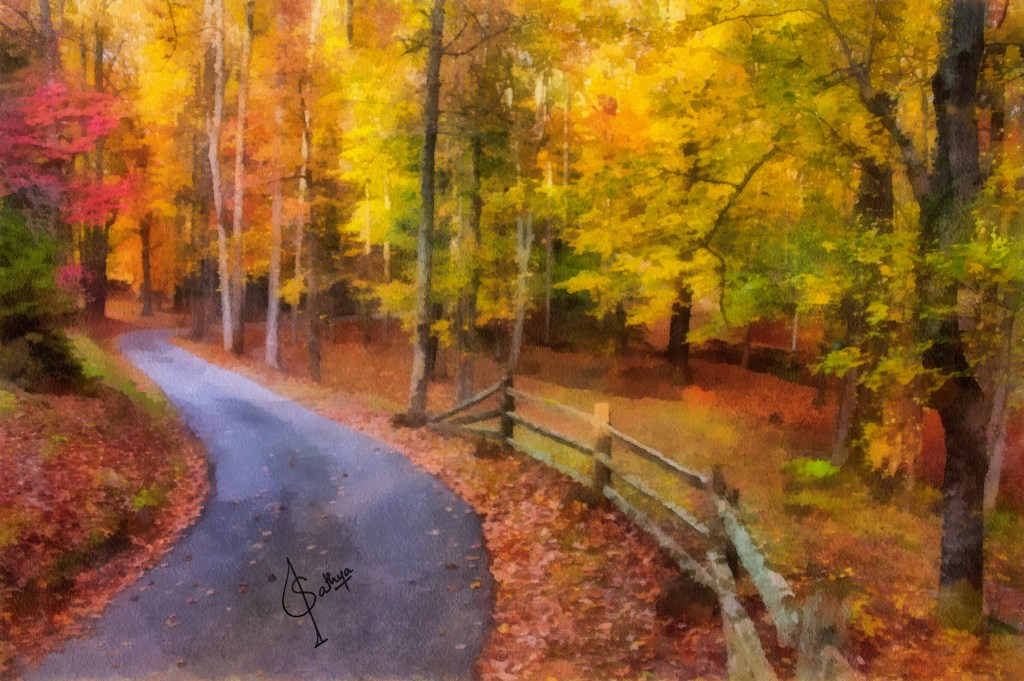
For example, I had this vision of creating a fall color scene with a leading road. Waiting for the right season, scouting the locations on google street view & then in person, checking out the weather and being there at the right time – got me this.
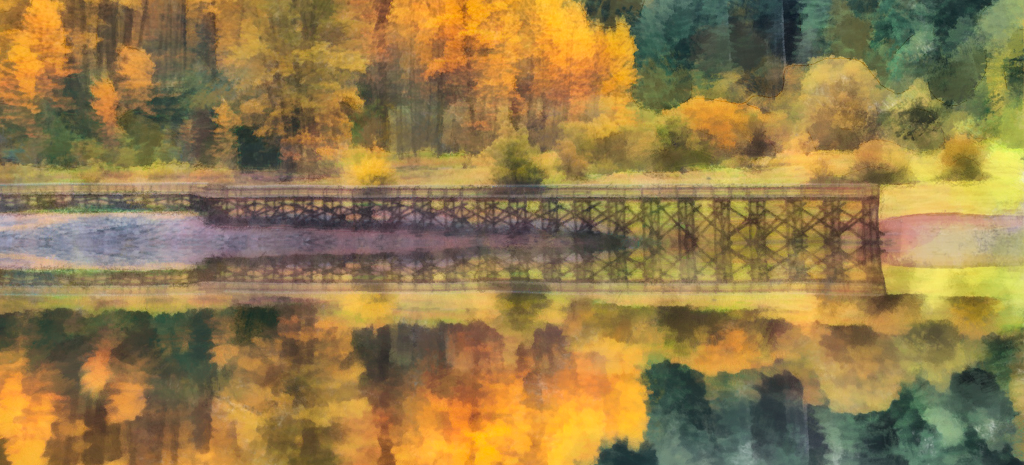
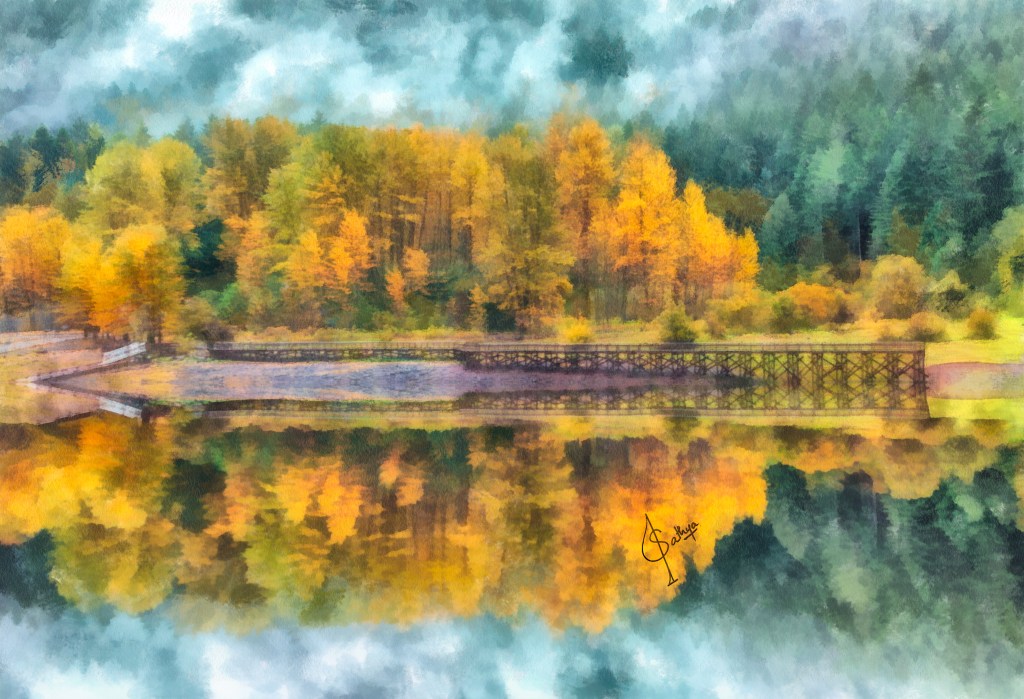
Wait for the light, hike up for the view, but when things don’t come together, don’t feel bad to use the artistic liberty, as required. This particular scene (below), I had wanted to go for that full reflection, with the morning fog. After driving for several hours and reaching early in the morning realized – there was no way to access the water for a lower vantage or wait for the seasons to change for a higher water level. So I completed the reflection in Photoshop :)
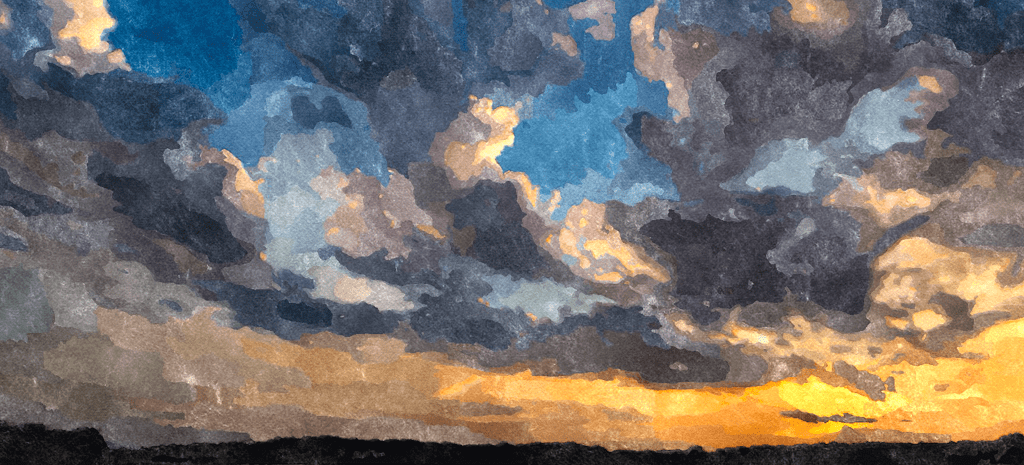
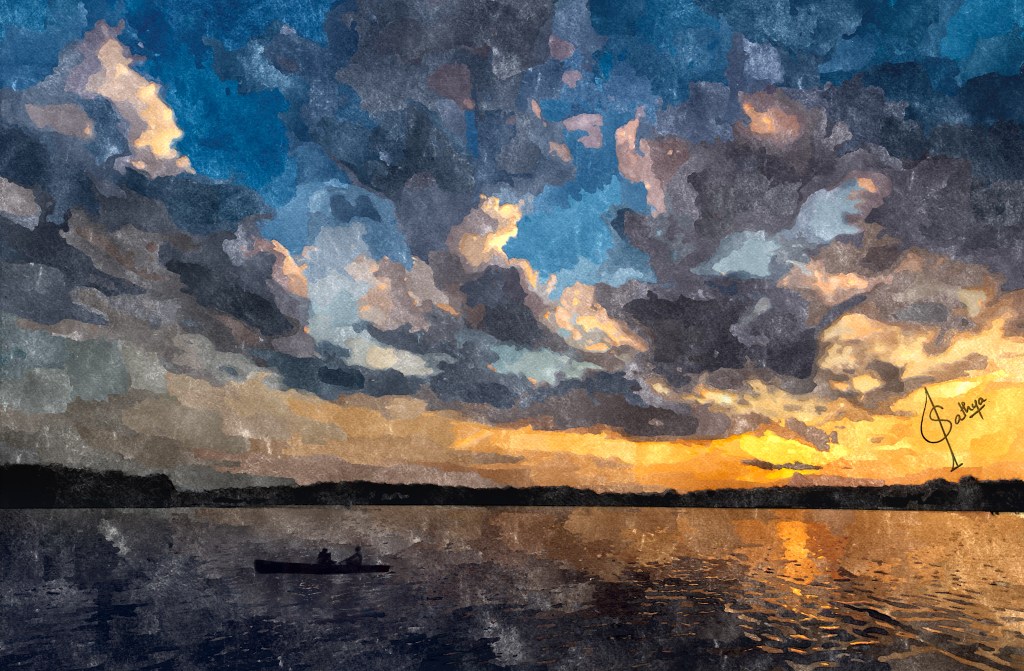
Lighting is crucial
Lighting as with any kind of photography is critical to capture the mood of the scene. You can address some in post, but you can never get the depth of the landscape in the middle of the afternoon when the light is harsh. Plan for the light to be right. A dynamic twilight with a ton of drama makes for a great subject than a boring plain blue afternoon sky :)
Dynamic Range & Manual Blending
The Mood & Feeling conveyed, is more important than what is actually getting captured.
Tweet
A few years back when High Dynamic Range (HDR) became mainstream, it immediately became a boon and a bane to photography post-processing. As with any technique, if pushed to an extreme, the results start to look unrealistic & plastic. So why are we talking about HDR? Traditionally, painters use different techniques and local contrast to depict a higher dynamic range – closer to that of human perception. HDR helps achieve this.
As we start with a photograph as the base, the post-processing around Manual Blending helps to increase the dynamic range of the scene. Several tools that can help around these are Adobe Lightroom, Adobe Photoshop CC, Aurora HDR, Photomatix.
If you have never heard of HDR, this tutorial from Elia Locardi should help you to get started.

Secret Sauce
Over the years, I had tried different stand-alone software(s), Photoshop plugin(s), actions, followed / tried different articles / tutorials on converting photos to paintings. Out of all – below are the (very few) options that cut it pretty close to obtain the true painting look and feel.
1. Watercolor Action set (Photoshop)
Have tried several Photoshop actions over the years. I was not convinced that Photoshop action(s) can ever be so versatile to handle different types of images until I came across the watercolor action last year. This Watercolor Artist action set was released by Adobe themselves and is quite comprehensive. I truly believe that if you are well versed with custom brushes, this action alone can help convert any photo to a lovely watercolor. One downside, personally – the results, though impressive have a very similar feel, irrespective of the source.
Step to download, Tutorials, Samples and more: https://create.adobe.com/2019/3/20/transform_photos_int.html
2. Fotosketcher (Free)
Fotosketcher is a hidden gem. I was surprised to learn there was just one individual – David Thoiron – behind the development and maintenance of this amazing software. Thank you, David. Though, even after Ver3.5, this is called a hobby project and is made available for free – it still has a lot of customization and options to covert photo to a painting – pencil sketch, oil sketch, Ink Sketch etc.
For my needs – Watercolor option under Painting Effects (Painting 5) had yielded the best results.
Download : https://fotosketcher.com/download-fotosketcher/
3. Dynamic Auto Painter (DAP)
DAP is a stand-alone software and comes with a cost, but as the name suggests, this is a dedicated s/w to convert your photos to paintings. It is worth the price and comes with a multitude of key features. There is a wide variety of paintings effects that you can generate. You can get started with the default settings and once you are comfortable with the s/w you can try out other advanced options.
For my needs – Aquarell and options under the same had yielded the best results. Generally, I use an output size of “Print for Web” or “Large Size Print” and mostly turn off natural borders. I also disable “Real Canvas” and get the canvas feel later in Photoshop as it gives me more control.
Download : https://www.mediachance.com/dap/index.html
Bringing it all Together
Art is not about perfection – it is about expression
Even with all the above options, I am yet to come across a single tool that does the conversion exceptionally well for all scenes and different lighting conditions. This is where – you as an artist get to bring in your choices & artistry.
If you have tried your hand on drawing / painting – even for a bit, it helps. If not, don’t fret, you will pick these as you play along.
- the distant objects are not as detailed as the ones that are near
- focus and details can aid in driving attention to where it is intended
- local contrast can be used to boost the dynamic range selectively
- deep and detailed local shadows bring the rendering to realism
- basic color theory and color harmony
For a painter, grey is the richest color, the one that makes all the others speak: Paul Klee, Artist
Tweet
Luminosity Masks
Luminosity Masks – as someone said – is the next best invention to sliced bread. It involves quite a learning curve but is a great addition to one’s post-processing toolset. Once you have a hold., it is like a magic wand starting with things like Dynamic blending that we discussed in the earlier sessions.
Each of the Secret Sauce that we saw earlier, perform well for a combination of given light and contrast. Digital Blending with Luminosity Masking gives you the power to get the best of each one and bring it all together.
There are many online locations where Luminosity Mask Actions can be downloaded. But it is worth taking time to go over the basics, as it greatly aids with manual blending. A good one with details around basics can be found at Tony Kuyper‘s blog.
Finishing Touches
The quality of paper is crucial for watercolor. It generally defines how watercolor & strokes respond. The amount of water (wet on wet) controls the flow and helps revel the underlying paper’s texture. Textures add a subtle, yet significant feel to the final painting. In our case, we don’t have a way to mimic the water flow for each stroke, but we do have the freedom to try out different textures, in post and see what works out. Choose your background appropriately, depending on the effect – watercolor paper, aquarelle paper, canvas etc. Here are a few sample textures, to get started. Depending on the shade of the texture, you can try different Layer blend modes. For lighter shades – Hard Light or Overlap works just right. You can also adjust the Opacity to control the strength of the texture.
Signature adds a nice personal touch. When the final art is meant for print, I prefer to sign on the canvas. Depending on the print material, some of the options that work great are Deco Color (Silver) Marker, Sakura Pigma Micron Pen, Pentel Sunburst Metallic Gel Pen, Signo Broad Point Gel Pen. For online publishing / sharing, a soft signature or e-signature via Photoshop works equally great. It is easy to create a signature on mobile or even scan / take a photo of your signature from paper. Once you have the soft copy, covert it to a transparent png and add it in via a layer with (Multiply or Overlay blend mode) in Photoshop.
Art impacts others, the process of creating art impacts the artist.
Tweet
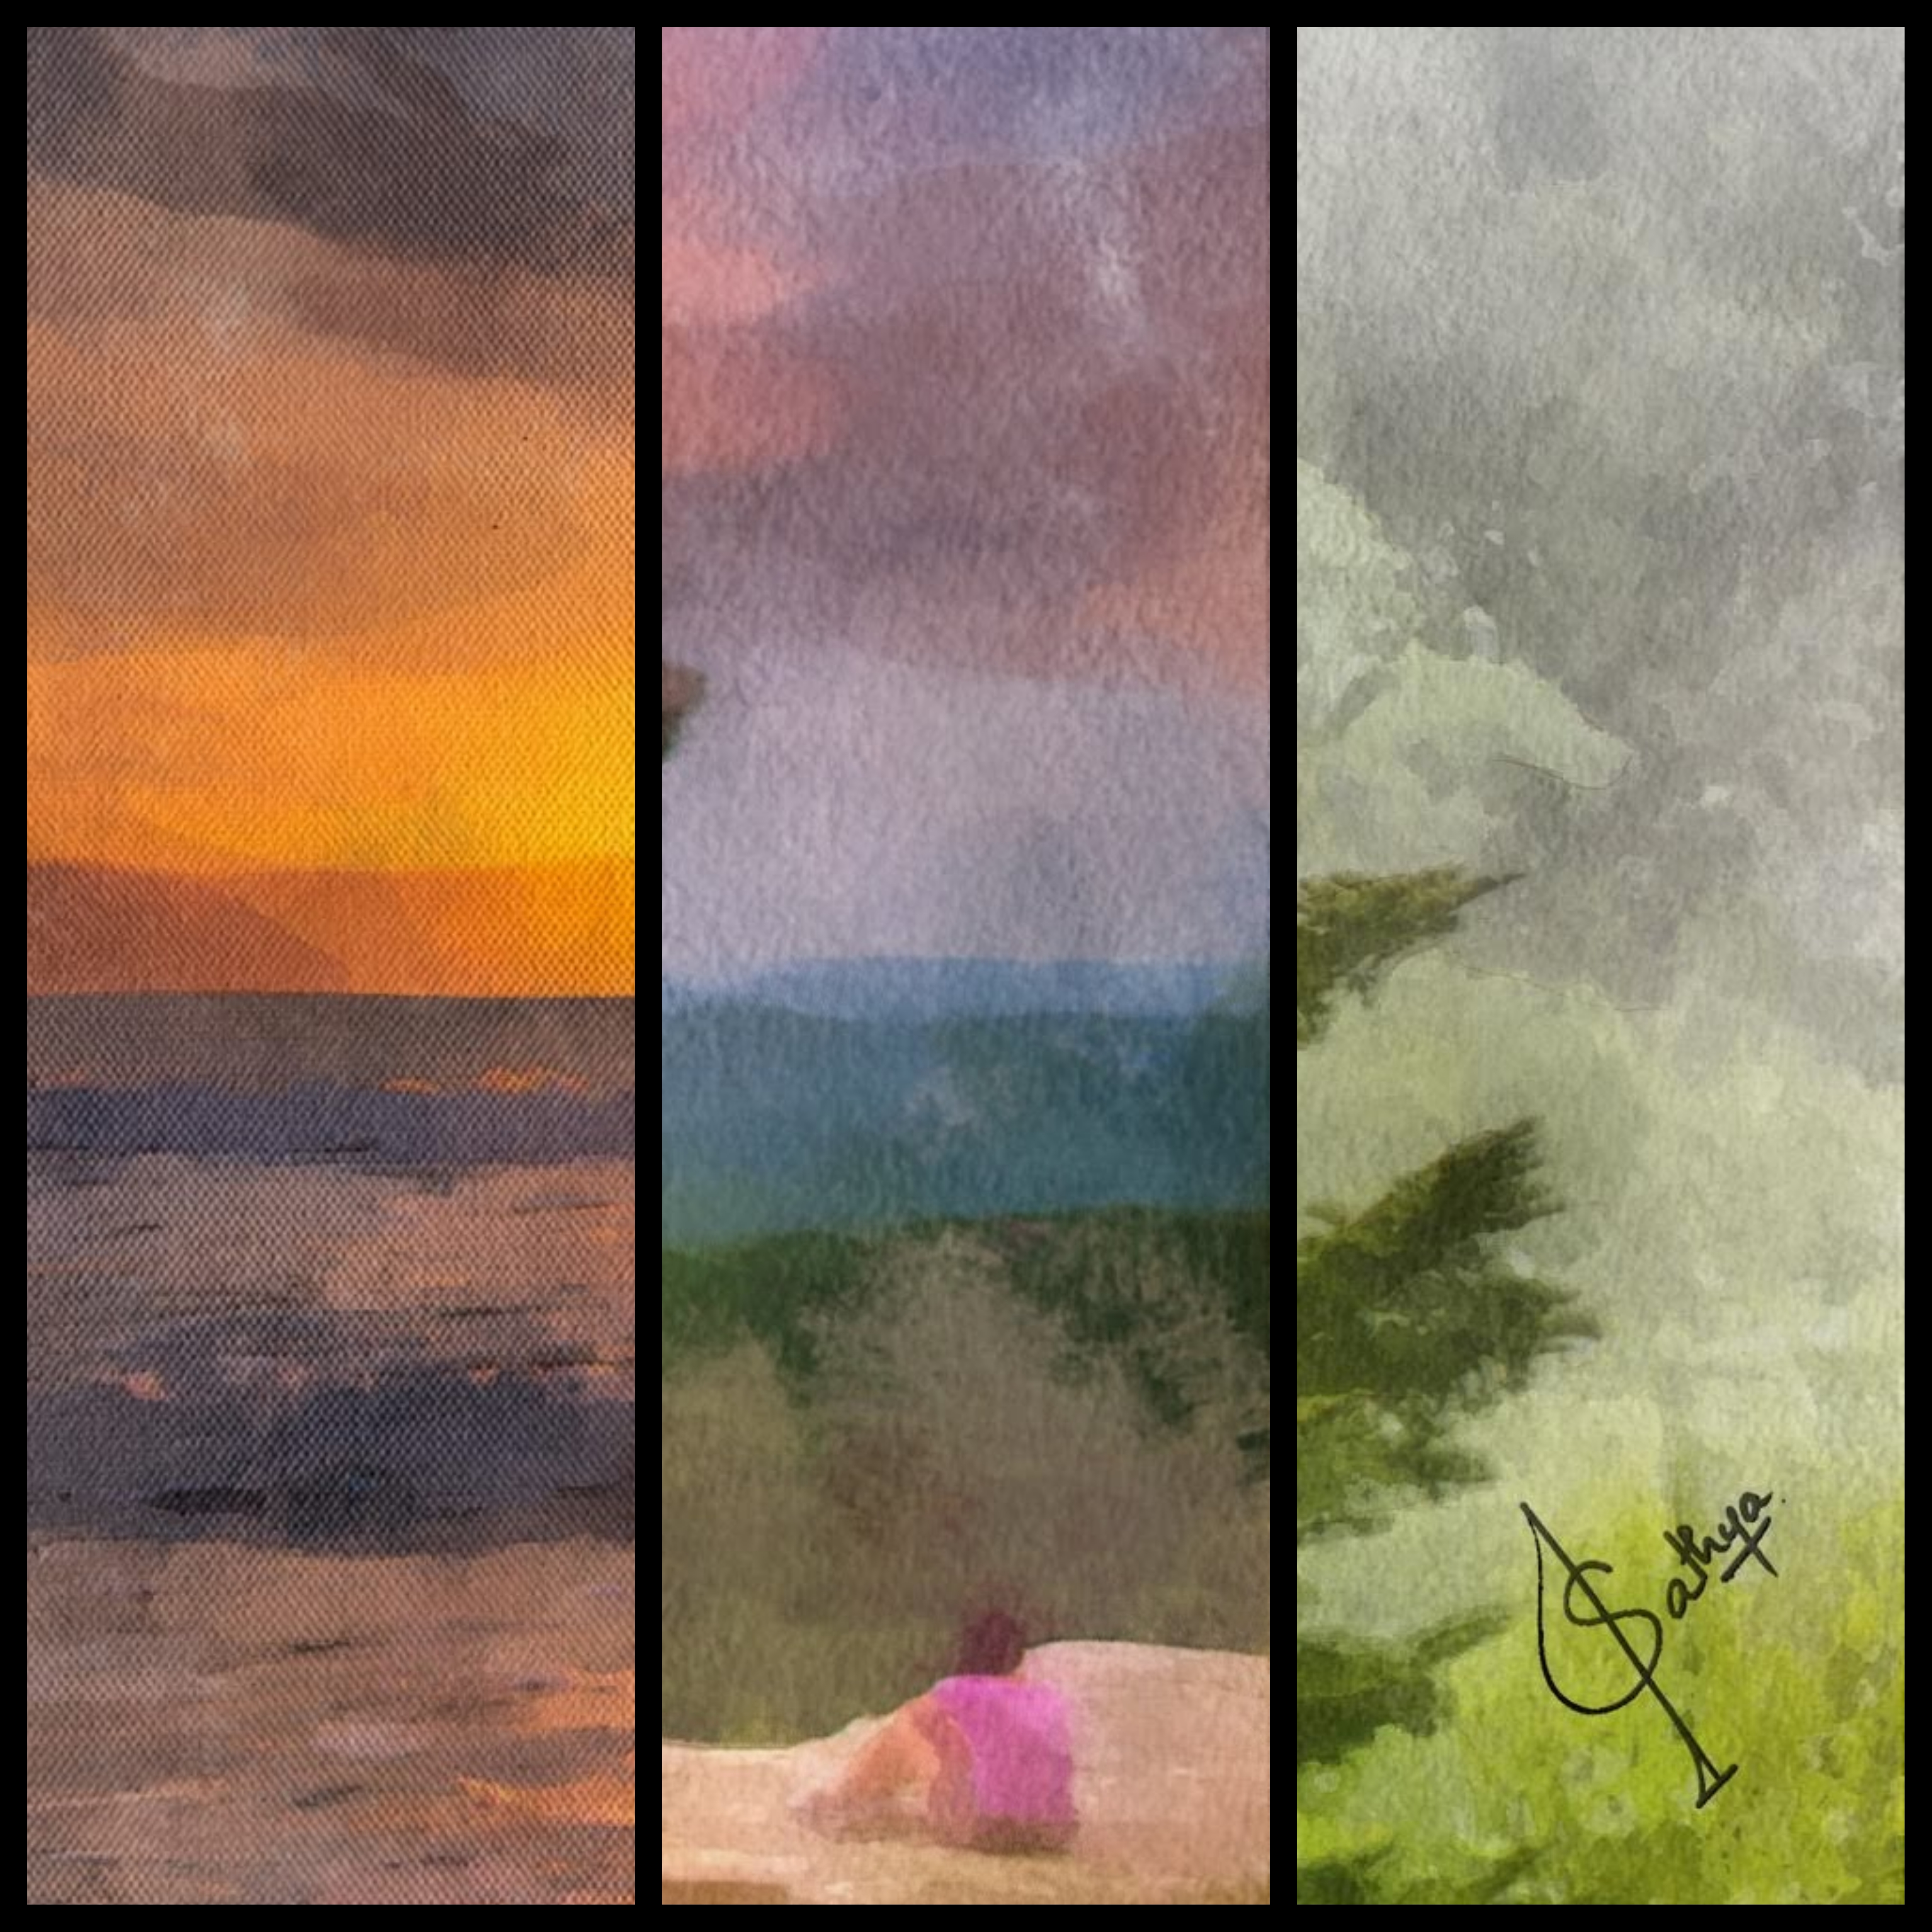
Below are several of my work. Hope you let yourself to be impacted ! These involve a blend of several of the above techniques and finally finished in Photoshop. If you feel inspired, do give it a try and share your work of art in comments …
Go, Create some art :)


Leave a comment